How to Install/Setup Office.com 2019

Beginning with setup Office.com 2019, all Office products for Windows that are available through Volume Licensing use Click-to-Run technology instead of the traditional Windows Installer technology. To deploy volume licensed versions of setup Office.com 2019 products for users in your organization, you'll use the Office Deployment Tool (ODT).
You'll need a broadband Internet connection with download speeds of at least 20 Mbps to download Office 2019 products. Note that Office 2019 products require Windows 10 and will not run on older versions of Windows.
Step One: Register at the VLSC and Accept Your Software Agreement
If you haven't already, register at the VLSC and accept your software license agreement for the Office 2019 products you requested by completing only steps one and two in our VLSC quick-start guide.
Step Two: Get Your Office 2019 Product Key from the VLSC
- Sign in to the VLSC.
- Select the Downloads and Keys tab.
- Find your Office 2019 product in the list and click its Key link.
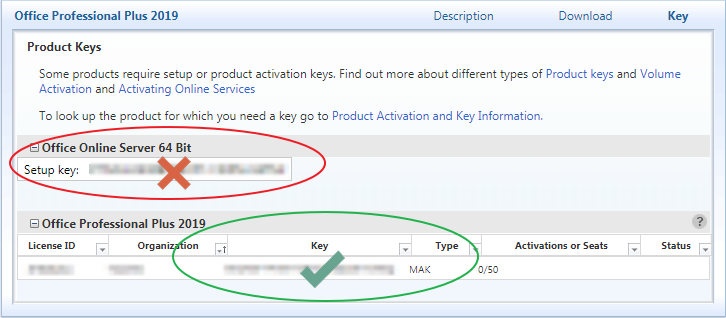
- In the table beneath the name of the product, find your product key in the column labeled Key. The Type column for this key should say MAK, not KMS.
- Office suites have separate setup keys for online functionality like web apps. These keys are not the same as the MAK product keys and cannot be used for volume activation of desktop products.
- Office suites have separate setup keys for online functionality like web apps. These keys are not the same as the MAK product keys and cannot be used for volume activation of desktop products.
- Copy the product's individual key from this table and paste it into a program like Notepad or click Export all keys: CSV just above the list of products to download a list of keys in comma-separated-values format (which can be opened with Excel). This list contains all Volume License keys associated with agreements in your VLSC profile.
Step Three: Download the Office Deployment Tool (ODT)
- Download the Office Deployment Tool from Microsoft.
- When the download is finished, open it, check the box to accept the Microsoft license terms, and click Continue.
- You will be asked to choose a folder to store the extracted setup files. Navigate to the root level of your computer's hard drive (C:) and click Make New Folder. Then, name the folder setup Office.com 2019 and continue with the extraction process. Note that these instructions won't work if you choose a different folder name or location.

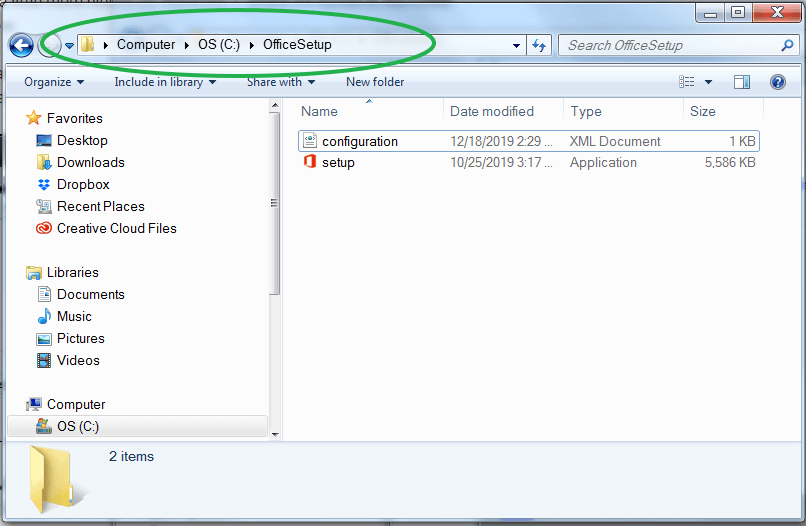
- When you are finished, your new setup Office.com 2019 folder should have a file named "setup" and some sample "configuration" files. Delete the configuration files. You only need to keep the setup file.
Step Four: Download and Prepare the Configuration File
Download the configuration file that you need from the table below by right-clicking the link for the file you need, selecting Save link as…, and saving the file to the setup Office.com 2019 folder you created. Don't download more than one of these files to that folder at a time. If you need to install more than one type of Office product, you'll have the opportunity to do so later
1.Right-click the configuration file and select Edit to open the file in Notepad.
2.Look for the following string of text in the configuration file
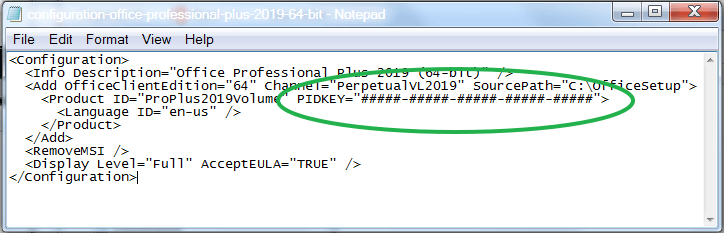
- In this string, replace #####-#####-#####-#####-##### with your MAK client activation key by copying and pasting the key from wherever you saved it. You should leave the quotation marks before and after the key.
- Save the file and close it.
- Then, right-click the configuration file, select Rename, and change the filename to be "configuration".
- If the configuration file you downloaded has a name that ends with ".xml", that means your installation of Windows has been set to display file extensions. If this is the case, make sure to keep ".xml" in your filename by renaming it as "configuration.xml" instead of "configuration".
If you need additional customization for your deployment and have IT experience, you can use Microsoft's Office Customization Tool to create your own configuration files.
Step Five: Download and Install Your Product
Note that all earlier versions of Office will be uninstalled when you install Office 2019 products, so be sure to save and quit any Office applications that are running.
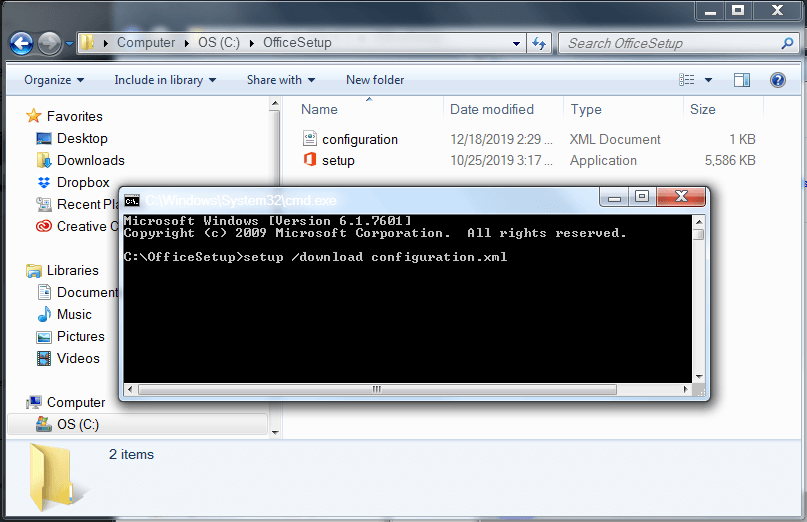
- Navigate to your setup Office.com 2019 folder in File Explorer.
- You'll need to perform the next steps using the Command Prompt, which is a text-based command-line interface that runs within Windows.
To open the Command Prompt- Click the address bar in the File Explorer window that you opened.
- With the address bar selected, type
cmdand press Enter.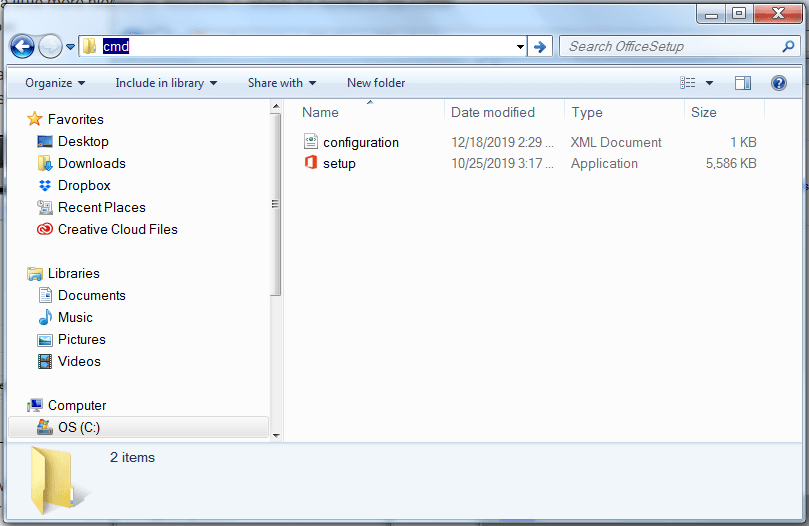
- Click the address bar in the File Explorer window that you opened.
- Type the following into the Command Prompt that you opened.It will look as if nothing is happening, but your product will be downloading in the background. The download will be a large file and might take a while to finish. Once the download is complete, you will be returned to the Command Prompt.
- When the download has finished, you're ready to install the product. Type the following into the Command Prompt.If you see an error that says you still have previous versions of Office installed on your computer, you'll need to manually uninstall those programs and type the above command again.
- When your installation is complete, you'll be returned to the Command Prompt. Close the Command Prompt and return to the desktop. Your Office 2019 product will be installed and ready to use.
- If you need to install a different Office product, delete the "configuration.xml" file from the setup Office.com 2019 folder and follow these instructions again beginning at Step Four: Download and Prepare the Configuration File.
If you need to customize your installation or need more detailed instructions, you can refer to Microsoft's Office 2019 deployment guide for IT professionals.
Comments
Post a Comment